Update
For a hands-on experience, have a look at the recent post with a Captivate tutorial about this topic.
Intro
Replay slide
Expression cpCmndGotoSlide = cpInfoCurrentSlide – 1
Continue
Whether you need the command Continue depends on the setup of the slide. If you leave it out, the play head will remain paused at at the first frame of the slide.
The advanced/shared action is essentially a translation from a still older action. , where more system variables starting with ‘rd’ existed, allowing a simple action instead of the one shown above. Reason: besides the cpInfoCurrentSlide, there was a second system variable rdInfoCurrentSlide. The first one was meant only to show the slide number, and for that reason starts its index with 1. The rd variable, like most system variables, starts its index with 0. , The simple action was:
Assign cpCmndGotoSlide with rdInfoCurrentSlide
Common misunderstanding is that this action will also ‘reset’ the slide which is NOT the case unless for very simple slides. Main reason: the play head never ‘re-enters’ the slide. Re-entering the slide is necessary to restore the original situation, either automatically, and/or by having an On Enter action being done again.
Reset slide
Hope we use the same terminology. Reset slide to me is to restore the slide to the situation it had when you first entered the slide. During the first visit of the slide lot can have been changed. Here is a not exhaustive list:
- Some object, originally hidden are now visible, or the reverse situation: originally visible, now hidden.
- Multi-state objects were changed to another state, both custom state or InBuilt state (think about the Visited state of a button).
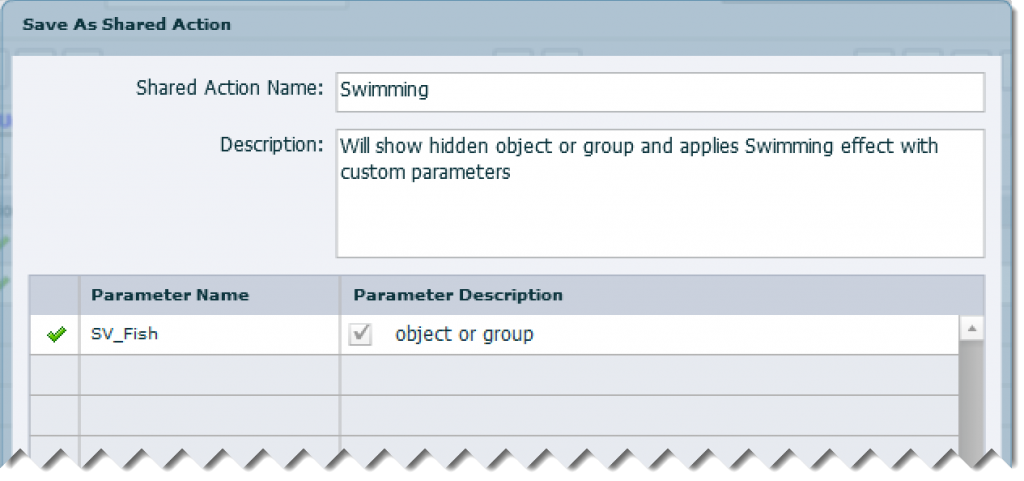
- Effects have been applied to objects or groups, which can have those objects being in a different location if the effect included a motion path.
- Knowledge Check slides have been answered. I will not talk about regular question slides, because those cannot be reset on slide level, only on Quiz level
- Drag&Drop slides set up as Knowledge Check slides have been answered. Same restriction for D&D slides setup as scored questions (quiz level needed). I hear you! You can add a Reset button to a D&D slide, indeed, but that will not reset everything if you used Object Actions.
- …
Essential for resetting is to re-enter the slide, to have the playhead revisit the On Enter slide event. For some of the described items that will be sufficient, for others it will be necessary to add an action On Enter. I demonstrated this situation in the recent presentation at Adobe eLearning World. You can find the recording still online in this portal. I will explain how to re-enter the slide (2 workflows).
Re-enter Slide (workflows)
Two workflows are possible (explained only the second one in the old post, but it has failed at least in one of the more recent releases and pushed me at the first workflow):
Dummy slide
Easy workflow, step-by-step:
- Insert a duplicate of the present slide before the present slide
- Take out all interactive objects of that slide, it should not have pausing points.
- If there is an On Enter action, delete it and get back to ‘No action’ or ‘Continue’ (same result)
- Reduce its duration to 0.1 secs which is the shorted possible duration.
- Attach this action to the Reset/Replay button:
Go to Previous slide
The play head will rewind to the dummy slide and since it is so short almost immediately (re)enters the present slide.
Drawback: you increase the number of slides. That may be annoying if you show the number of slides (cpInfoSlideCount) and/or if you use the TOC (where you’ll have to hide the dummy slides). I started using this approach in a version where micro-navigation had problems in HTML5 oiutput.
Tip: to avoid annoying flickering in case of low bandwidth, prefer a similar look for the dummy slide as for the present slide. I mostly use a duplicate, taking out all interactive objects and actions.
Micro-navigation
It is bit more complex but avoids adding slides. Workflow:
- Create a user variable v_start. It will be used to store the first frame of the slide.
- Use the On Enter slide event for this command (eventually to be combined with other commands)
Assign v_start with cpInfoCurrentFrame - For the Replay button use this command:
Expression cpCmndGotoFrameAndResume = v_start – 1
The play head will rewind to the frame before the start frame of the slide, which is the last frame of the previous slide. Due to ‘Resume’ in this system variable of the Movie Control category, the play head will continue and re-enter the slide immediately.
It may prove necessary to increase the '1' to 2 or 3 if you don't get the expected result. It is possible that the value of the first frame is one or two frames wrong. In most cases however it works fine.
The variable and the actions can be reused on all slides.
What is reset?
As mentioned before, some items will reset automatically when re-entering the slide by one of the described workflows. Here a non-exhaustive list from my experience:
- Multistate objects: if you keep the default setup where ‘Retain state on slide revisit’ remains unchecked. The normal state will re-appear as in the first visit of the slide. I have some blogs around which use that as an alternative for a Show/Hide scenario. Drawback: if you use the InBuilt state ‘Visited’ it will also disappear in this situation.
- Knowledge Check slides: will be completely reset, ready for a new attempt.
- Drag&Drop slides: are completely reset, including eventually changes to objects due to Object actions. That is not the case with the generic Reset button which can be added to such a slide.
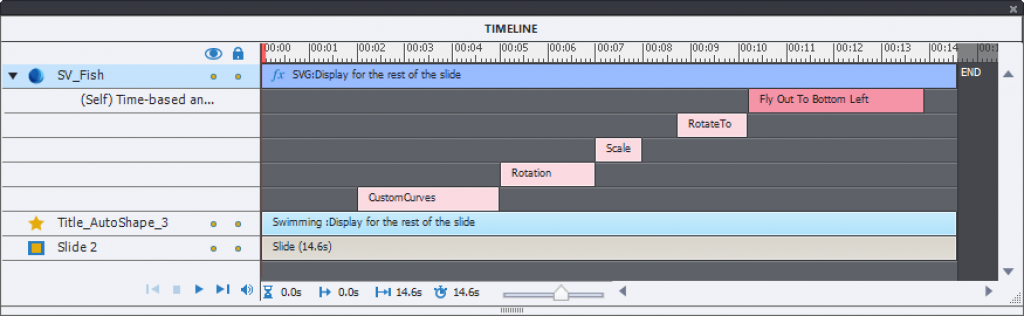
- Effects: as you know they can be added with three types of triggers. The easiest one, based on timeline will not need a Reset action, will be reset with a simple Replay action. However both the button triggered Effects and Effects triggered by an advanced or shared action need to re-enter the slide to have them reset to their original situation.
- Text Entry Boxes: if you change the value of the associated variable, that change is never visible right away but will now be correct after re-entering. Same for the variables of learning interactions like checkbox and radiobuttons. Not really ‘reset’, more of a ‘refresh’.
- Web objects: they will be reset to the first web page, which opens with indicated URL. If you use Replay that will not happen.
-
Animations like OAMs
What is NOT reset?
- Multistate objects: if you check the option ‘Retain state on slide revisit’ for the object.
- Hide/Show: items that have been shown or hidden during the Play head travel in the first visit will remain in that status.
- Enable/Disable: if this command has been used for interactive objects, they will remain in that state. I showed this in the presentation ‘Deep dive with Shared and Advanced Actions’ at the Adobe eLearning world conference: if you disable all interactive objects, the pausing points disappear and nothing will stop the play head.
- Variable values: they will not be reset to their original value.
- Score: if you have scored objects on the slide, the total score including this score will not be decreased.
How do you reset these items: by creating or editing the On Enter action. That is beyond the scope of this shorter blog. You can see multiple examples in some slides of the Quick Start Projects, or on my blog including the sample project I added to the mentioned presentation. I include that project here as well. Check the On Enter actions (and the consequence of missing such an action on the first slide).
Look out for a Captivate tutorial to illustrate the difference for several of the mentioned items. It will be published soon on this blog.