Intro
Almost 8 years ago I posted this article on my personal blog: Editing Motion Paths and Using Custom Effects.
Since that time Effects have been improved a lot, advanced and shared actions can make life much easier. Time to upgrade that blog post, meanwhile testing the behavior of effects in HTML output in CP2019. While Flash was always to be trusted, that is not the case for HTML output. And indeed, I bumped onto a problem with the Scale effect, and sometimes the Rotate to effect. When those problems are solved, I will post a published movie. The workflow to use Custom effects in a shared or advanced action is however still the same since many versions. It is a bit complicated, I have answered many questions about it in the forums. I will write it out now step by step.
When do you need a custom effect?
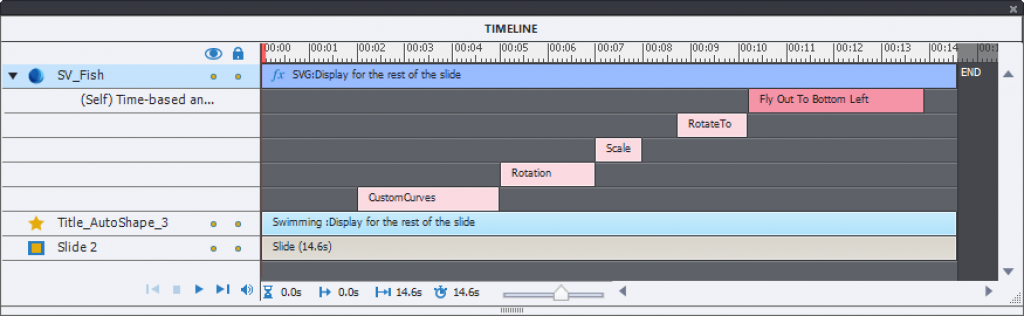
Effects have been improved in some ways. Some parameters can be defined in the Advanced Actions dialog box. Look for the start time of an effect, its duration and more numeric fields (alpha, rotation, ease in/out, alpha….). However when using a combination of effects over and over again, you can create one custom effect which saves that combination and can applied in one step including the sequence and duration of the different effects. Another practical example are the motion effects, where you need to edit the motion path, which is certainly the case for more complicated custom motion paths. This screenshot shows an example of a complicated combination of effects on the Timeline. It was meant to be applied to simulate a swimming fish:
Step by Step
Step 1: Create and save effect
Create the effect or combination of effects on any object as a ‘Self)time based animation and test it out thoroughly (Preview HTML in Browser for a non-responsive project) in several browsers before saving it with a custom name.
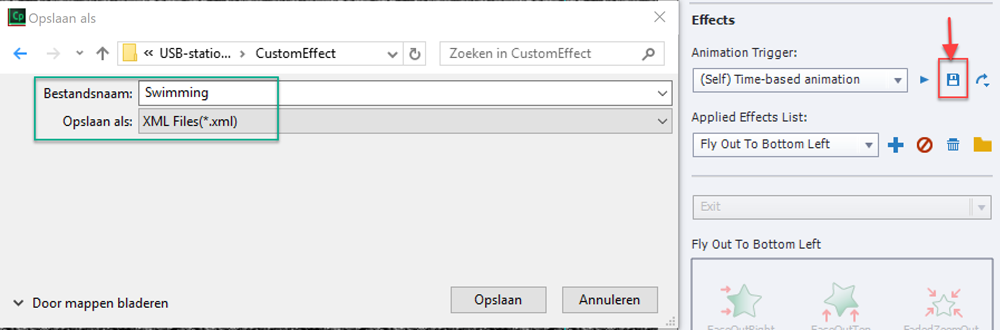
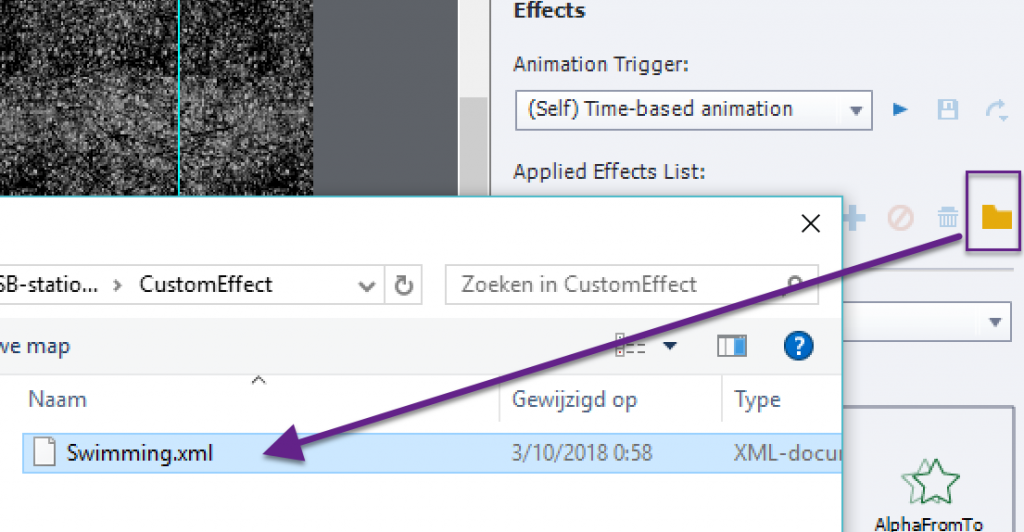
You don’t need to save it in a specific folder. I use to save it with the project I am working on as is the case in the screenshot above. Effects are stored in XML-files.
Step 2: Apply the custom effect as time-based animation
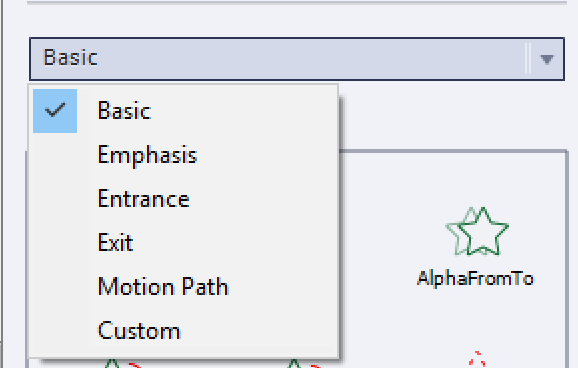
If you would try to use the saved effect in a shared/advanced action it will no be available. If this is the first custom effect you ever created, there will not even be a Custom category to choose from You need first to delete all the individual effects applied to the object (above it was to the object SV_Fish (a SVG image). Then apply the custom effect as a (Self) time based animation again, but now with ‘one’ effect chosen with the browse button.
When looking at the timeline you’ll see exactly the same result as in the screenshot at the beginning: all the effects in the correct sequence and with the duration you had chosen.
The result of this second application is that the Category ‘Custom’ will now have been created, and it will have the new custom effect ‘Swimming’.
Step “: use in advanced or shared action
If you only wanted to apply this action using an interactive object, you could use a simple action. The field Category will now have the Custom category.
However often effects are used in Advanced or Shared actions in combination with other commands. In this example the Fishes are originally hidden, so I need to Show them and apply the effectn eventually also have an audio clip playing separately.
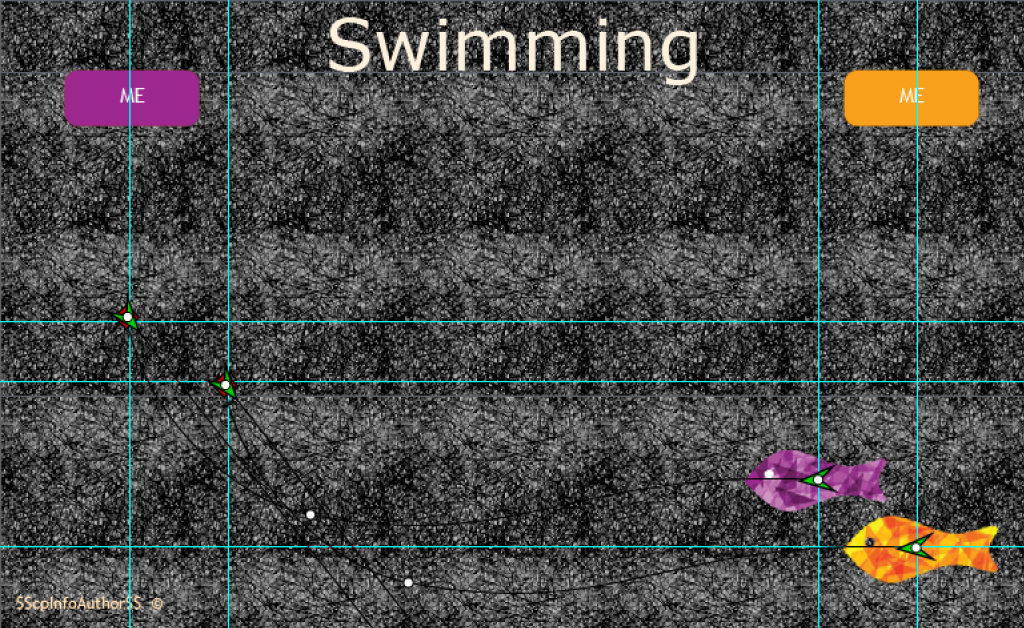
The two buttons on this example will trigger the same shared action. Both fishes are hidden in output at the start. When creating the advanced action, the category Custom can now be used, and the available parameters (start, duration) could be edited, but mostly you’ll not want to do that.

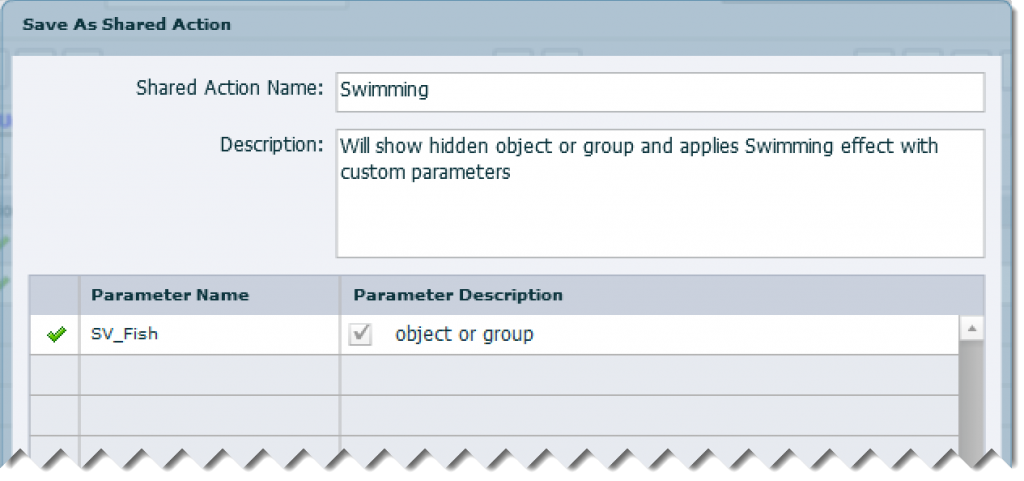
Because I needed to use this action twice, maybe also later in other projects unchanged or as template for other actions, I preferred a shared action which will have only one parameter: the object itself. An effect cannot be a parameter. However, the effect can not only be applied to one object, but also to a group. I can replace one fish by a group of fishes.