Using Copy/Paste Appearance in 11.5.0

Intro

Copy/paste appearance is a new feature in the most recent release 11.5.0.476 of Captivate. Many call it a Format Painter like in MS Word, but I do not agree with that statement at all. I have sort of a ‘dual’ feeling about this added feature , Even the simple Format painter in Word can be a ‘two-edged sword'.  Same for Appearance transfer in Captivate: It can be used in a wise way or make your life as developer become a nightmarel.

Do I use the Format Painter in Word? Sure, when I have to write a quick short document, which I’m sure I will never have to edit later on. Even in that case I mostly use it for paragraph formatting, seldom for text formatting. When creating courses in Word  (which happened if they were mostly text-based switched to Framemaker when I could get a license in college, because it handles graphics and other assets lot better) I would NEVER use the format painter. Even Word has Styles for a professional workflow. Captivate is style-based as well, in the sense of Framemaker and InDesign.  Object styles are part of the theme you are using in a course, and I have published several posts about themes.

In this post I will try to explain which situations are suited for using appearance duplication. It is not possible for all object types, as you will discover, and has a hidden gem which you may not have discovered (yet). Let me know if my guess is wrong.

Objects supporting Copy/Paste Appearance

Not all object types can be used for duplication of its appearance to another. I checked them out and list up those who do have the options 'Copy Appearance' in their right-click menu.

Static objects

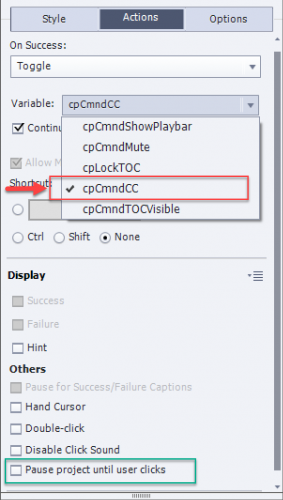
First requirement is that the object type had an object style. This means that images, audio, video, bitmap image as button, SVG used as button do not have the feature. Check the Object Style Manager. That is also the right place to detect the included features in a style. Example:  Transition (Fade in/out with its duration) is part of the object style. When using the Appearance feature it will be transferred as well. The supported objects for appearance pasting are a minority. You cannot use it for Highlight box, zoom object, rollover items although they have an object style. Only text containers:

  • Captions: in the themes packaged with the present versions, all used captions are transparent captions. But the older not-transparent captions are still available. They always come with the Callout pointer in several directions, the used pointer will not be transferred. Have a look at the screenshot below. You can transfer the style of the left caption (pastel orange) to the right caption (default style). top left pointer will not be transferred. But color, font, font size and attribute, alignment, margins, leading (space between lines) and transition will be pasted.

  • Shapes: can also be a text container, but that is not compulsory. Fill, Stroke, Transition and Text properties will be transferred. The shape itself is not part of the style and will not be changed.

After using the Copy/paste featuure

Look at the style names. For the shape the style has been taken over on the second shape, which is great!. However the style of the left caption has been applied but shows a + sign to indicate an overridden style.  I have tried this for quite a lot of captions, it seems to be always the case  and that is bad news! When later on you want to change something in the applied style (here MyCaption), that change would not be applied to the right caption shown  in the screenshots. Hence my

Warning

If you use Copy/paste appearance on text captions, and you have decided on the final look you will need to double-check the styles and avoid all overridden styles. If you forget to do so, the slightest edit you’ll have to apply in the future to that style will become a nightmare.

This problem doesn’t exist as you can see for shapes used as text containers. Double-checking at least some never harms of course. Another reason to reinforce my decision to use only shapes as text containers.

Interactive Objects

Text Entry Box, Text Button, Transparent Button, Image button have object styles but you cannot use the Copy/Paste Appearance for those objects, you need to apply object styles. A click box is invisible, so it doesn’t have an object style.

The only interactive object to accept Appearance duplication is the Shape button, my favorite Captivate object! Its object style includes the look of the Inbuilt Styles Normal, Rollover and Down (not Visited).  What is the result of a Copy/paste Appearance. Here are two shape buttons, and their Object States panels. The left button has a custom style MyShapeButton, the right button uses the Default Smart Shape Style of this theme:

Both buttons have the 4th InBuilt state - Visited - added. Its default look starts as the Normal state but I edited the style. After copy/paste appearance from the left to the right button, you expect to see this:

The good news is that the second button has now also the style MyShapeButton applied to it, same as for a non-button shape. Have a look at the new Object State panel of the right button:

As expected, the Visited state didn’t take on the look of the original MyShapeButton style, except …. for the font and its size! This observation leads me to the related:

Hidden Gem

Captivate has no individual Text Styles (no Character styles, no Paragraph styles), they are included in the object styles of the text containers (like shapes and captions, text entry boxes). Up till now I used Copy/Paste appearance to transfer styles between objects from the same type: caption to caption, shape to shape, shape button to shape button. However it is possible to copy/paste the text style between objects who are not the same type. That may not  seem unexpected between shape and shape button, but it IS ALSO possible between Caption and Shape or Shape button!

Workflow:

  • Go into Edit mode for the Caption, and select all the text if you want also to transfer the leading (F2, CTRL A)
  • Right-click, Copy Appearance
  • Go into Edit mode for the Shape, select all text (see above)
  • Right-click, Paste Appearance

If the shape is a shape button, the text style will appear in all the InBuilt states.

Of course the name of the styles will not be transferred, since a text style has non name. The style will show a +, which means it is overridden. If you decide to keep the text change in the shape, please create a new style.

Using Appearance Duplication

This new feature can be useful, but should never replace Object styles.  I would use it when being in “Draft” mode at the start of a project, when  discussing with the client about style choices. Certainly the easy way to transfer text styles is appealing to me, if followed by creation of an object style. But due to the fact that you can never be sure object styles will not be overridden (as is the case for captions) there is no way to create the custom theme before double-checking all styles. I start each project with a custom theme, because it can save so many hours of work in the future. The changes for themes in this new update are also very welcome, but that will be in another article.

Copy/paste appearance can be very useful when creating multistate objects to transfer the style of the normal state to other states. Think about a shape button, where the font style of the label is not always transferred to the other InBuilt states. 

Discover/Use Captivate's System Variables - Part 2

Intro

In a first blog about System variables I offered a free table with description an references for all system variables. If you didn't get that table yet, please get it from that article. That older post described shortly all caregories. It had focus on the variable categories s which are read only, and how they can be used to show information in a course and/or for editing/debugging reasons (like cpInfoCurrentFrame).  Not treated in that first part was the Quizzing category because I already had a detailed explanation in this blog post.

Here the focus is on that very special category 'Movie Control'. It is special because those variables cannot be inserted for viewing in a course.  More important is that they can be controlled, changed by the developer on runtime which is not possible for any variable for the other categories. Learning how to control these variables can be a good step up to getting started with advanced or shared actions: more complicated actions than the simple actions which you find in the dropdown list on the Actions tab of an interactive object.

Terminology

Since this post is meant for users starting with variables, I want to explain some terms that are important expecially when working with system variables of the Movie Control category. You can skip this part is it sounds familiar to you.

Slides versus Frames

In questions on the forum I often see confusion between those two terms. A normal cptx project is slide-based. That leads many users to suppose that Captivate is functioning like Powerpoint, but that is not true. Essentially Captivate will lead to a movie, not to a sequence of slides which is typical for a presentation. That movie is more than a simple video, because interactivity is based on offering control to the user and to do so you need to  pause the movie. This is not the case with a video: the learner can pause the video, but the developer has no influence of therm with the exception of the interactive videos. I use the term interactive movie for a fully interactive published Captivate file. An interactive video is not better at all, more of a hype at this moment, because is interactivity is more limited. Although a PPT can have animations with some duration and seqeuence, it is not a real movie unless you capture it as a movie. 

Any video/movie is played at a certain 'speed'. The speed is defined in frames per second or FPS. The default speed of a published cptx file is set to 30FPS (but a video demo at 15FPS). If you keep the default length of a slide in CP, which is 3 seconds, that means that you have 90 frames in that slide. 

I explained these terms already many times. As you can see in the table, several system variables in the Movie Control category are linked to navigation between slides or frames. Understanding the difference is required.

Boolean variable

A variable can have any value in Captivate: a text (often called string) or a number. When you look in the table you will see the typical values of the system variables. Many of them also aren:  from the 'Boolean' type. That is a variable that will have only two possible values: 0 or 1, true or false. You can interchange them easily, I prefer using the numbers 0/1 because it is less typing.  In the Movie control category many variables are indicated as Boolean: cpCmndCC, cpCmndMute, cpCmndNextSlide, cpCmndPause, cpCmndPlaybarMoved (pretty useless, internal), cpCmndPrevious, cpCmndResume, cpCmndShowPlaybar, cpCmndTOCVisible and cpCmndLockTOC.

Like other variables Booleans have a default (or start) value which you find also in the table. Often it is 0, which means the situation described by the variable is turned OFF. But there are exceptions. Some examples:

  • cpCmndMute: default value = 0, which means that audio is playing
  • cpCmndPause: default value = 0, which means the course is not paused
  • cpCmndShowPlaybar: default value = 1, which means that the playbar is visible
  • cpCmndTOCVisible: default value = 0, which means that the TOC in overlay is not visible

Toggle

When used as a verb, this means 'switch between two situations'.  I didn't use the word 'state' to avoid confusion with states in a multistate object. You can toggle a playbar between the visible and hidden situation, audio between muted and not muted, a TOC in overlay between expanded and collapsed, any object or group between visible and invisible. There is a close relation between Boolean variables and toggling. For that reason a couple of versions ago the new command/action Toggle' appeared in the dropdown list of the Actions tab, and in the advanced actions dialog box. 

Some people also use Toggle to indicate a Toggle button. That is a button which allows to switch between two situations£. Several buttons on the Captivate playbar are toggle buttons: turning CC on/off, play or mute audio, pause or continue the movie. 

Use Cases

Toggle buttons

CC on/off

If you use custom buttons instead of a playbar, which is recommended for any non-linear project, you can create a toggle button to turn Closed Captioning on/of. Beware: in versions before CP2017, Closed Captioning was always turned off when the course started. That is the reason why the default value of cpCmndCC  is still indicated as O. With the new more elaborated features for CC, you also have the possibility to turn CC on for a project. In that case the variable will have the value 1.  To create a toggle button for this feature you can use a shape button on the main master slide (no need for pausing) if you are in a non-responsive project. For a responsive project with fluid boxes, using the main master slide is a bad idea (no fluid boxes possible), you'll have to use the other master slides. Use guides for the creation of the footer fluid box, so that it is consistent for all the master slides.

Create this simple action to be triggered by the Success event of the button:

Since you don't need this button to pause the slide, you have to uncheck the option 'Pause Project until user clicks'.

Audio on/off, Playbar on/off, Overlay TOC expand/collapse, TOC lock/unlock

The workflow is exactly the same as for the CC toggle button. In the screenshot you see that the appropriate system variables show up and can be selected.

It is of course possible to replace a toggle button by two  buttons. Example: a button to show the overlay TOC  and another one to hide it. In that case you could use the commands 'Show TOC' (same result as Assign cpCmndTOCVisible with 1) and 'Hide TOC' (same result as Assign cpCmndTOCVisible with 0). This is  an alternative for the tiny expand/collapse buttons attached top left of the slide. A toggle button saves space on the slide, easier to manage. 

Two buttons are also possible for Playbar on/off  (Show Playbar/Hide Playbar) and for locking/unlocking the TOC for navigation (Lock TOC/Unlokc TOC). 

For Audio on/off you do NOT find such simple actions in the Actions tab.  'Play Audio' is meant only to play an audio clip, but has no effect on slide audio, object audio, nor background audio. Similar with 'Stop Triggered Audio' which can only stop clips started with the command 'Play Audio'. If you want two buttons, you will need to use the system variable cpCmndMute, with the Assign command:

  1. Assign cpCmndMute with 1    will mute audio
  2. Assign cpCmndMute with 0     will have it play again

To create a toggle button with a different look when the situation is toggled, you'll need an advanced or shared action. Have a look at: 

1 action = 5 toggle buttons

Shape category ‘Buttons’ – Challenge

Being a tutorial for newbie (no advanced/shared actions, I will not explain using the navigation system variables for two reasons:

  1. You probably never will use the slide navigation variables  for navigation between slides. It is intuitive to use ‘Go to Next Slide’, muc more than ‘Assign cpCmndNextSlide with 1’
  2. The navigation variable cpCmndGotoFrame is  very important in micro-navigation but that is a more advanced topic that needs the use of advanced/shared actions. If you are interested, have a look at: Intro to Micro-navigation

However I have a challenge for you! The shape dialog box has a special category labeled ‘Buttons’.

Typical for these shapes: the option ‘Use as button’ is checked off (no pausing point by default). They will trigger an action, which for most buttons is a simple action. You will see that the Mute button  is assigning “1” to the system variable cpCmndMute. The three buttons marked in the screenshot trigger an advanced action: the Home button and the Start button (both marked in red) use the advanced action ‘startSlide‘, the End button (marked in green) uses ‘endSlide‘.  You can open th action in the Advanced Actions dialog box,  by clicking the Browse icon:

Look at the use of the system variables in startSlide :

  • Assign cpCmndGotoSlide with 0          this means: go to the first slide (index starts with 0)
  • Assign cpCmndResume with 1              is the same as Continue

Can you explain the script ‘endSlide’?

More?

A lot more is possible when using the movie control variables in advanced or shared actions. I already posted some links before. Here is a link to a blog post about ‘Replay Slide‘ where you’ll find different scenarios. It will help to understand the importance of frames: if you only get back to the first frame of the slide, reset will not happen if this is done by an On Enter action, or if you have Text Entry Boxes/Drag&Drop slide.

For newbies I plan a third article about user variables and simple use of them (still without advanced/shared actions). Would love to get some comments.

Micro-navigation (introduction)

Intro

Recently I presented two sessions about the Timeline at the Adobe eLearning Conference in DC (25th of April 2018). Maybe you did read a previous post, where I offered some easy Timeline Tweaks, taken from the first presentation 'Demystifying Captivate's Timeline' which was aimed at clarifying basic features of the timeline, including the different ways of pausing the timeline. The second presentation 'Mastering Captivate's Timeline' plunged deeper into exploring advanced workflows, including use of variables, advanced/shared actions and.... micro-navigation. I created that term in this (old) article. The word has been adopted by many Captivate users. Time to upgrade this article to integrate the changes within newer versions (system variable names) and the switch from SWF to HTML output. If you have a look at that article, please use a Flash Player enabled browser to watch the embedded interactive movie (SWF).  The present post can be considered as an introduction to 'micro-navigation'. We will start with a comparison between navigation between Slides (macro-navigation) and navigation between Frames.

Navigation

Between Slides

You, Captivate user,  are aware of slides and master slides. Slides appear in the Filmstrip and each slide is based on a master slide Master slides have a dedicated panel, which looks very similar to the Filmstrip. In the Newbie UI when activating the Master Slide panel it will replace the Filmstrip in the left docking station. The Timeline panel can be used both for slides and master slides. Timing (horizontal scale) itself has no real meaning for master slides,  panel is used to change the stack order (or z-order) of objects. If you insert a shape button having a pausing point on a master slide,  pause will be visible at the end of the timeline. 
For sure you have used navigation commands for slides. In the dropdown list of the Actions tab for any event (slide event, interactive object event) or hyperlink navigation commands are available. They allow you to override the default navigation. 'Default navigation' means when the playhead reaches the end of a slide it will automatically move to the next slide.
The slide navigation commands are:
  • Go to the next slide

  • Go to the previous slide

  • Jump to slide ...

  • Go to last slide visited

Maybe you are not aware of the availability of dedicated Shape buttons in the Shape thumbnail dialog box, that have an advanced action to go to the Last slide or the First slide of a project?
Also less known are the system variables from the category 'Movie Control'  related to slide navigation. They be used in actions:
  • cpCmndGotoSlide  can be used to replace the simple command 'Jump to Slide'; beware: index starts with 0, whereas the index of cpInfoCurrentSlide starts with 1 (exceptional to make it possible to use in a progress indicator). If you want to restart a slide without re-entering the slide, you can use "Expression cpCmndGotoSlide = cpInfoCurrentSlide - 1"  

  • cpCmndNextSlide  is a Boolean variable with a default value of 0. With 'Assign cpCmndNextSlide with 1" has the same result as Go to the next slide     
  • cpCmndPrevious is a Boolean variable with a default value of 0. With 'Assign cpCmndPrevious with 1" has the same result as Go to the previous slide

Between Frames

A published cptx-file (to HTML or SWF) is an interactive movie. Each movie '(and animation' plays at a certain speed, the 'professional' name for that speed is 'Frames per Second' rate, or FPS. The quality of a movie depends on the resolution but also on that FPS number. The default FPS for a published cptx-file is 30FPS. You can see this rate in the Project Info panel.
 

It is possible to change FPS rate in Preferences, Project Publish settings.

 
With the default rate (30), each second on the timeline has 30 frames, the smallest unit on the timeline  (0,1sec) 3 frames.  I use the word micro-navigation for navigation between frames. Contrary to the navigation to slides, there are no commands available for micro-navigation. It is only possible using advanced or shared actions which allow you to manipulate the system variables available for frames. The relevant frame system variables are:
    
From the category 'Movie Information'
  • cpInfoCurrentFrame: your best friend when exploring Captivate's timeline, debugging projects with advanced actions, micro-navigation etc. You'll find that variable inserted in a text container quite often in my tutorials. You can watch an example in this interactive movie   
              
  • cpInfoFPS: returns the FPS rate, by default set to 30 as explained above. This variable can be used in calculations (with Expression) to convert from seconds to frames.

  • cpInfoFrameCount: similar to cpInfoSlideCount (total number of slides in project) it returns the total number of frames in the project. It can be used in combination with the previous variales to calculate to the total duration of the project (as shown in the TOC).
    From the category 'Movie Control'
  • cpCmndGotoFrame can be used to jump to a frame using its frame number (similar to cpCmndGotoSlide); playhead will not be released, project remains paused.
  • cpCmndGotoFrameAndResume can be used to jump to a frame using its frame number and to release the playhead at the same time, project will continue.

Testing? 

It is just a proposal: test out what you learned by creating a one-slide project, similar to the one visible at the start of this post and as thumbnail.  Design is up to you, but this is required for the 'exercise':

  1. Replace 'No action' for the On Enter event of the slide by 'Pause'; the slide shouldn't start playing automatically.
  2. Insert the system variable cpInfoCurrentFrame in a text container (example has it bottom right); that will allow you to track the location of the playhead. When starting the slide it will pause immediately, it will show 1 (although the system variable starts with 0, there is a small delay).
  3. You need two buttons: one for navigation forward, and one for navigation backwards. I used two shape buttons from the category Buttons, but replaced the action (see below). In the example they are at bottom center.
  4. A number of objects staggered on the timeline. In the example I have 7 shapes aligned in a row. They appear 1 second later than the previous one. All objects are timed for the Rest of the Slide. Result will be that the slide itself will have a duration that is longer (8secs in my case). To move an object on the timeline one second to the right: select the timeline of that object and use shortcut key CTRL-right (see Colors and Keys for Timeline). Here is a screenshot of the Timeline in my example:

    You see a small gap (0,1 sec) before the first object. Reason is the delay I mentioned before: playhead is stopped at frame 1, I don' want that shape to appear immediately. Because this is a one slide project, I didn't need to pause the slide at all, not even at the end. Both buttons have no pausing point as you can see in the Timeline.

Three events are used on this slide for actions:

  1. I already mentioned the On Enter event of the slide, which is set to 'Pause'.
  2. The button SB_Next triggers a one-line advanced action that should look like this:
  3. The button SB_Back triggers a one-line advanced action similar to the previous one, but with the math operator for subtracting instead of adding.

Test now, either after publishing and uploading to a webserver, or with Preview HTML in Browser! 
Everything is working as exptected? Great, you are ready for more advanced workflows with micronavigation. Watch out for the next article about micro-navigation: a shared action that can be used in different situations: forcing full view of a slide on first visit, but not on later visits is one of the use cases.


Captivate 8 - First Adventures

Review? Not really...

Lot of well-known Captivate users have already blogged about the new features in version 8 of Captivate, released this week:  Michael Lund and Jim Leichliter are not the only friends who published their review. If you are a regular visitor of this blog, you'll know that I don't want to talk about features before having been able to explore the final release and that I'm used to offer an article with at least one example movie to demo what I try to explain. Some will be disappointed that the included movies are not responsive projects, but a good old SWF's (sorry Mac-users). You'll see some of the less-talked about new enhancements in Captivate 8. 

Focus on?

Watch this first movie. Focus in this project was on:

  • new possibility to customize theme colors: I edited one of the new themes, based on a Kuler palette (imported in the Swatches) panel; for this palette I used the colorful new box-shot  of Captivate 7 as resource

  • the ability to save and reuse custom shapes: for the shape buttons I used a custom shapes that are now available to me in the shape library

  • creating Normal, Rollover and Down states for Shape buttons and save those states in one Shape button object style: all buttons in the movie are shape buttons with 3 states; I used two shape button object styles

  • shared actions: being able to define variables and literals as parameters

  • shared actions: dragging them from the Library onto slides or interactive objects to open immediately the Parameters dialog

  • shared actions: being able to exclude variables, literals as parameters; discovered some nifty tricks!  Maybe I'll offer them in the future

  • new character sets
The project is showing a typical dashboard, that allows branching to different parts of the movie. For the sake of simplicity each part is only one slide in this case. The number of visits to each part is visible when returning to the dashboard. I hope you'll also discover the total number of visits to all parts in that dashboard (red number). When all parts have been visited, something happens on the dashboard. If you want to play again, you'll be able to reset at the end. There is no playbar, no TOC.

Movie

Actions & Variables

Five user variables were created:

  • v_counter: tracks the total number of views of chapters
  • v_ch1: tracks the number of views of the first chapter
  • v_ch2, v_ch3 and v_ch4: similar for the three other chapters
Tip: To keep it simple I limited to four chapters. If you want to store the shared actions in a Library to be used in future projects, it is better to have the maximum number of chapters you'll ever use.

As you can see in the Library, I created/used three shared actions. Only the Reset functionality uses an advanced action (not described in this article).


1. FirstViewBt

This action is triggered by the four shape buttons that appear the first time on the dashboard slide. It is a standard action, that will replace the button itself by a second version, navigates to the first slide of the chapter to be visited, increments both the general v_counter and the specific v_chx variables. The advanced action (before saving as shared action) is visible in this screenshot:

When saving this action as a shared action, the dialog box looks different from Captivate 7:

Watch the icons in the first column (fuchsia colored rectangle): before entering the description, this column will have the Warning icon for the items that are automatically defined as parameters: objects/groups. In this example 3 objects had that status: the buttons (BullletRight_1 and Sec_1), the first slide of the chapter. However now you'll also see variables and literals as possible candidates for parameters! They are normally indicated by a check mark (green) in the first column. In this example: v_counter, '1'(literal used in Increment statements) and v_ch1. To turn such a candidate in a parameter, you have to check it in the third column (blue rectangle). In this case I choose to make turn the chapter specific variable v_ch1 into a parameter. The warning icon appeared, and will disappear when I confirm the entered description. Both v_counter and the literal '1' are no parameters, since they will not have to be changed when using the shared action for a different button.


2. NextViewBt

This action is triggered by the four shape buttons that replace the first view buttons (by previous described action). It is a simple version of FirstViewBt with only three statements:
  • increment v_counter
  • increment specific chapter user variable
  • jump to first slide of that chapter
Only two parameters in this case: the specific chapter user var (v_chx which was a candidate) and the first slide of the chapter (compulsary parameter). As for FirstViewBt, neither v_counter nor the literal '1' were promoted to parameter.

3. EnterDash

This action is triggered when entering the Dashboard slide. It is a conditional action with two decisions. In these screenshots you see the Advanced action from which I started. First decision 'None' will make the slide ready for a first view, second decision 'AllDone' will make the Next button (navigates to last slide) visible and do some more bonus tricks.
I'm smiling at this moment, because I 'hear' a lot of questions: 
  1. Why did I convert this into a shared action?
  2. What are the parameters for this shared action?
  3. Can the user vars be parameters, they are used more than once?
  4. Same question perhaps for the literal '0' that is used 8 times?
  5. ....yours ?
Or is it crystal clear? Let me know. One tip: I used the shared actions for this movie:

Movie2: reused shared actions


Dare to Share - part 3

A while ago I published two posts as an introduction to shared actions in Captivate 7. At that moment I promised a third part about reusing shared actions in other projects. But since I was aware of the imminent release of CP8, and as a professional procrastinator, I postponed this part. I will explain how I reused the shared actions described in this article for the second movie. Watch out next week.


Conclusion

For those who expected a complete review or Captivate 8, sorry!  These are not the only CP8 features that I like. Honestly there are also changes that I don't like. Maybe I will post more about both when I feel capable to judge better. 'Hurry slowly' as a great friend tells me all the time. The enhancements I started to discuss today, I have been exploring already (also during prerelease) more in depth. In Dutch there is a proverb, freely translated like 'Each bird sings his own song, depending on his beak'.  I need more time for my songs.

Captivate 6 - Advanced Actions

Intro

If you did read some of my posts, you'll know that I focus often on using Advanced actions in Captivate to extend its functionalities. And if you look at the just released version 6, like me, at first sight you will be disappointed because apparently nothing much has changed about Advanced actions: no enhancements in the user interface, only two possible new statements (play and stop an audio clip), still not possible to export/import/print/comment those advanced actions, etc. To re-use them you'll have to create a template, and here is a first positive note: it is now possible to save an existing cptx-file as a template.

Same as with the release of Captivate 5.5 I'll leave it to the Evangelists and other Captivate friends to talk about the big new features like new video demo, interactions, shapes, quiz enhancements, themes, shapes etc. Those more visible features, even though they are exciting, have never been targeted by this blog and I'm a focussed person. Hoping to find time to publish more in the near future, planning to use the new video feature to publish some YouTube videos about.... advanced actions. Let me know if you find that useful?

Favourites

On this release day, I want to tell you how two new features (my first favs) will save you a lot of time when scripting advanced actions:
  • object grouping
  • shapes used as buttons
For this purpose I recreated in CP6 a Game, explained in a previous post: Concentration Game. Can you have a look there and play the game if you do not remember about it? The CP6 version is a bit simplified, has less cards and only one image to discover. But the differences due to those new features will be very clear.

Later on, after having explored more in the released version (for the moment I'm still using an prerelease version) I will try to publish a list with my likes and dislikes, in the same sense as this one: What I (dis)like in Captivate 5.5.

Shape buttons

In the original game, each part of the image was covered up with three objects:
  1. a mnemonic-image to be disclosed on click, set for the rest of the project so that it has only one ID
  2. another image with the back of the card, visible before the mnemonic is disclosed, set for the rest of the project for the same reason
  3. a click box to trigger an advanced action:  this cannot be set for the rest of the project
In Captivate 6 I replaced the objects 2 and 3 by one Shape button. Contrary to other interactive objects, a shape button can be set for the rest of the project, to preserve its unique ID. Since now only two instead of three objects have to be addressed, advanced actions will be shorter.

Object Grouping

Long awaited feature: being able to group objects on the Timeline, to label the groups, to collapse/expand them, to make them visible/invisible on the stage for editing reasons. Less known: you can use the group label in advanced actions as well, to execute a statement on all the objects of the group. That is great for show/hide or for enable/disable actions. In the new game I choose to create a group with all the Mnenomics, and another group with the Shape buttons. When entering the last slide (Congratulations) all those objects have to be hidden. In Captivate 5.5 this resulted in a long list with Hide statements, 3 for each card (since I had three objects per card). In Captivate 6 you only need two statements: one for each group, whatever the number of objects in that group. That is really a great time saver.

Video

Do not judge me too harsh, this is my first try at the new video demo feature, have still a lot to learn by practice. If the video doesn't show up on your page, please watch it on YouTube: Advanced actions Captivate 6.
Watch the differences between the two games, and how both the shape buttons and the object grouping made the scripting easier in Captivate 6. Be sure, will blog more about actions triggered by Shape buttons! They cannot only be displayed for the rest of the project, but also be added to master slides and question slides. This opens new possibilities.