Intro
Themes thumbnails dialog box
In older versions this dialog box had thumbnails of the available themes in the Layouts folder (and you could browse for themes in other locations). The active theme – which always had to be unique – was highlighted with name and resolution visible. The default theme was marked by a check mark.
In 11.5 this dialog box has two parts, separated by a horizontal line. The next screenshot, and indicated explanation is valid for projects with one theme, not with multiple themes:

The top part shows the active theme, as usual with name and resolution. For a responsive project it is the resolution for the primary view (desktop).
The bottom part shows more available themes, and you can use the Browse hyperlink to search (custom) themes which may be stored on your system. Themes show name and resolution when hovering over the thumbnail. The default theme is still recognizable at its check mark. You see above that I have set the Blank theme as default theme).
To apply another theme to the project, select the new theme from the bottom part (or browse to it) and accept the warning. All slides will be converted to the new theme, which will replace the old theme in the top part. This workflow has not changed, but you’ll see below that this changes for projects with multiple themes.
Totally NEW is the button ‘Theme Properties’, replacing the former ‘Theme Colors’. You’ll read about this new panel in next point.
Themes Properties panel
Clicking the Theme Properties panel, will open this new panel, which shows you (for a one-theme project) the Fonts used in this theme (new) and the Color palette used:
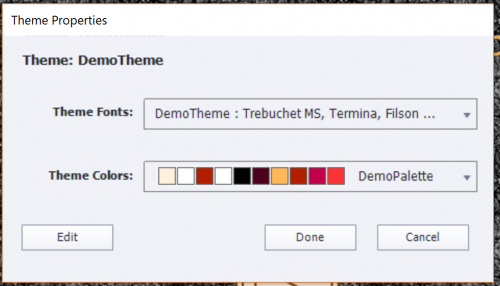
Fonts may not be totally visible the panel cannot be resized (which is the pity). But clicking the Edit button at the bottom will show you all used fonts and colors, ready for editing.
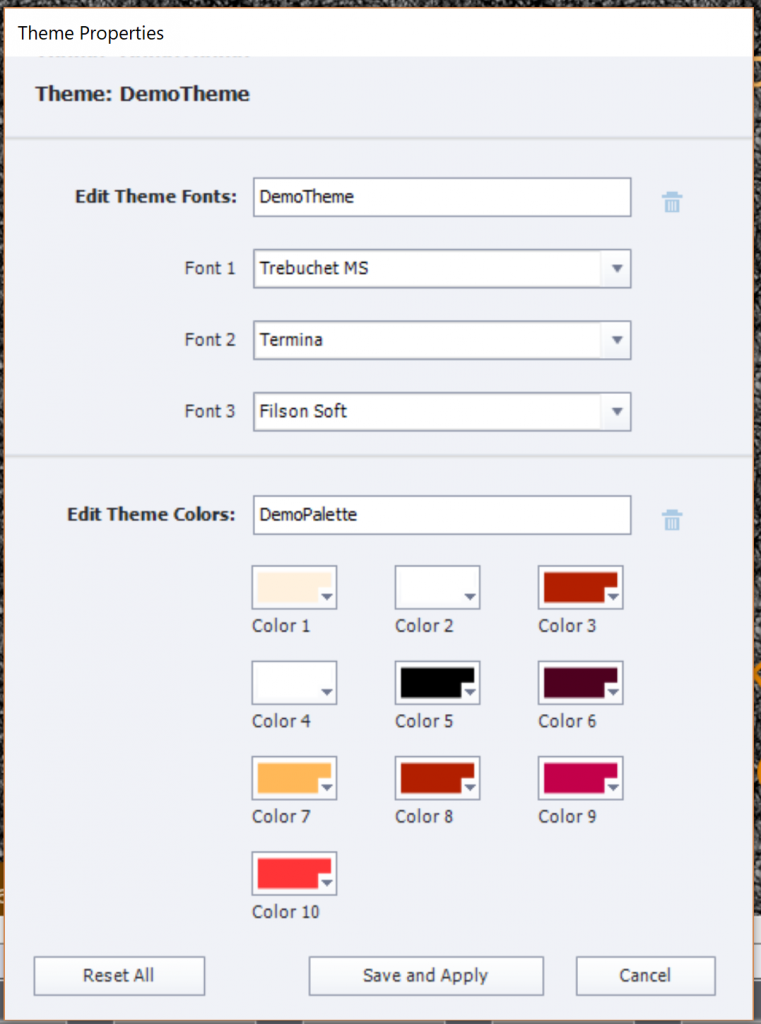
A new functionality, which can save you many working hours: it is now very easy to replace one of the used fonts by another font. I always recommend to avoid using system fonts, use only websafe fonts or Adobe (formerly Typekit) fonts. That way you’ll be sure that all learners will see the font you had in mind, even when using dynamic text (includes variables) or creating a Fluid Boxes project. In older versions, replacing a font was very cumbersome, because you had to screen all object styles in the Object style manager which included characters, and change them one by one ( see Manage the Object Style Manager ). In this editing panel you cannot see however the Usage of the fonts (feature request) but it is already a big enhancement!
As I mentioned in my first review of version 11.5, the colors in the palette have now simple numbered names. The older names (Title, Subtitle, …) were confusing because they were rarely used for those objects. Editing colors in the color palette is the same as in previous versions.
Theme in Slide Properties
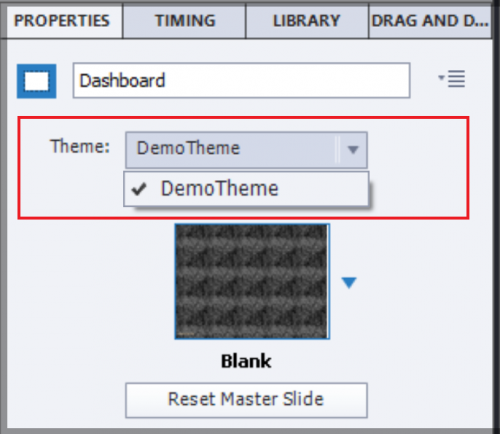
Less important for a course with only one theme, but the Slide Properties have an indicator of the used theme for that slide:
Theme fonts in dropdown list PI
When you are in edit mode for text containers (captions or shapes), the dropdown list for fonts will show at the top a group 'Theme fonts', which is new. The following group are the Adobe fonts (formerly Typekit fonts) if you have licensed some. The third group is the usual 'Websafe' group. You should limit font use to those groups, System fonts have to be avoided, especially if you are creating fluid boxes project. If you use system fonts, there is no guarantee that your learners will see that font, that it will be replaced by a generic font like Times New Roman or Tahoma.

Multi-theme projects
You can insert slides using another theme than the project theme. Once inserted you’ll see in the Filmstrip an icon, showing two options Use destination Theme or
Keep Source Theme (which is the default choice). Beware: this icon only appears when a slide is inserted. When you insert another slide, the icon will disappear, in favor of the last inserted slide.
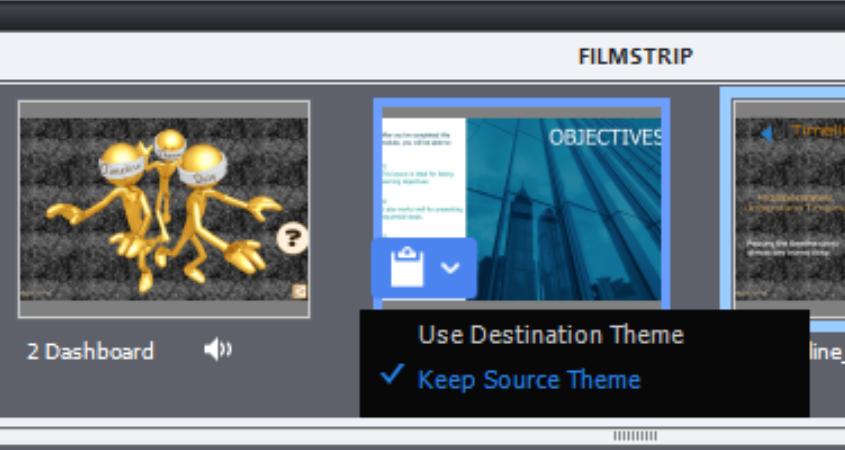
Look at this screenshot, taken after insertion of a slide with the “Earth” Theme (one of the Quick Start Project themes). You see that the first slide no longer has the icon, it was in the theme ‘Aspire’ has no longer the icon. This project has now 3 used themes: DemoTheme (my custom theme), Aspire and Earth. What is now the destination theme for the last slide? It is not the original project theme, but the theme ‘Aspire’ of the previous slide. I find this bit confusing.
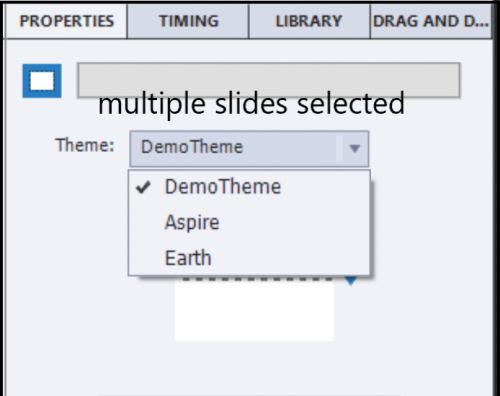
You can use one of these two workflows to change the theme of a slide (where you no longer have the icon to change to the destination theme):
- Select the slide, use the Themes button and click the theme you want as destination theme for the slide. If there is no appropriate master slide, it will be added to the destination theme.
- Select the slide, use the dropdown list in the Properties panel (see screenshot) and choose the destination theme. If there is no appropriate master slide, you will be invited to choose one of the existing master slides.
In the thumbnails under the big button Themes, all the used project themes appear in the top part. The ‘active’ theme shown is the one of the slide selected at that moment. If you select multiples slides, not all using the same theme, it is the theme of the first slide selected who will show its theme as active?
Clicking the Theme Properties panel will bring you to the properties of the active theme. If you want to see the Properties for another theme used in the project, do NOT click that theme in the top part of the thumbnails, because you would change the used theme for the active slide!. You need to leave the thumbnails dialog box, select a slide in the filmstrip with that other theme to make it active in the thumbnails, in order to be able to access its theme properties.
Master slides
In a multi-theme project, the master slide panel will show only the master slides belonging to the theme of the selected slide, not all the master slide used in the project. Just a warning: if you have both the Filmstrip and the Master slide panel open, which is only possible in the Expert UI, not in the default UI, the master slide panel will not refresh automatically if you choose a slide with another theme than the one showing at this moment. You have to leave the master slide panel and come back to force it to refresh.
If you change the theme of an inserted slide to the destination theme, and it uses a master slide which is not available in the destination theme, an extra master slide will be created. It will use the destination theme colors palette and its object styles.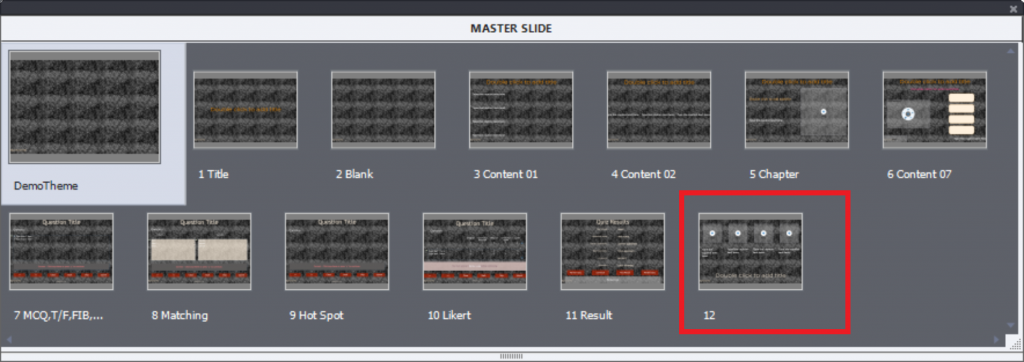
If that happens, you may have to use the button ‘Reset master slide’ to enforce the use of the new object styles. It is not always happening automatically, if an extra master slide was needed.
Object Styles
Theme fonts in PI
Same logic: the dropdown list in the Properties panel, will show the Theme fonts for the theme used by the selected slide.
Skin editor?
When i explored the skin, I found that only one skin exists. In the example I used for the screenshots, the skin designed for the custom theme ‘DemoTheme’ was always applied. Even when I have changed all the slides to another theme, or applied another theme to the whole project (where the message appears that skin is updated). Not sure what is going on, will update this post when I have more information.
I did not check out Recording defaults, last component of any theme.


