Intro
After the introduction to Micro-Navigation I explained how to use it for forcing the first view of a slide, and for playing an audio file on first visit. When looking at the resulting advanced actions they are pretty similar in both posts. Moreover you probably will want to use the action on multiple slides in the course, and maybe also in future courses. That sounds like a perfect scenario for conversion of the action to a Shared action. I have been blogging already several times about Shared actions. In the present article I try to explain how to reflect on the use of parameters. Static objects need to be parameters as are states and groups, I label them as 'compulsory'. But Variables and Literals are 'candidate parameters', a well-founded choice for change them in parameters, can save you lot of time later on. Consider it a good practice example.
Analysis
When comparing the two advanced actions created in the mentioned articles, there is a small difference: the first decision (which is a standard action) has one command extra in the second advanced action (for Audio). For the ForceAct, the number of seconds to be jumped over is directly entered in the Expression command, for the SkipSlideAudio, Assign is used to store the number of seconds in the user variable v_skip. Both versions work well, but personally for a shared action I prefer the one with the extra Assign command.

What are the parameters for the shared action?
For the first decision (labeled Always in both advanced actions):
- 'Assign v_skip with 16.5': this first command has two candidate parameters, the variable v_skip and the literal 16.5. The variable can be reused on each slide where the action is needed. Both advanced actions used the same variable in the interactive movie. There is no need to promote that variable to a parameter in that case. However the literal '16.5' is the number of seconds to be jumped, will have a unique value on each slide, it has to be promoted to a parameter. Parameter 1 = literal. You have to be careful with literals: double-check that the same numerical value is not used anywhere else in the action. In this example there is a second literal '1' in the second decision, Increment command. It has to be different from the first parameter, which is the case.
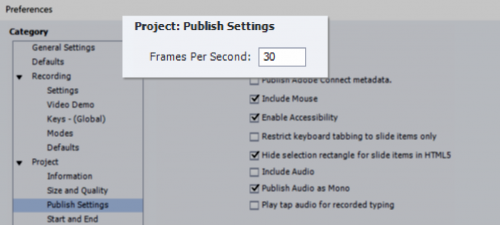
- 'Expression v_skip = v_skip * cpInfoFPS': the user variable v_skip is no parameter (see above). The system variable cpInfoFPS has never to be replaced by another variable, will be no parameter neither.
- 'Increment v_visit by 1': the user variable v_visit has to be unique for each slide, as you can see in the action SkipSlideAufio where another variable has been used. This means that we have to promote that variable to a parameter, parameter 2. The literal '1' however will always be the same, no need to turn it into a parameter. We already double-checked that the literal in the first decision was different from 1.
The second decision is conditional:
- 'IF v_visit is greater than 1': has two candidate parameters as well. We already indicated that v_visit is a parameter. The literal in this case will always be 1, will never be changed and need not to be a parameter.
- 'Expression cpCmndGotoFrameAnd Resume = cpInfoCurrentFrame + v_skip': has 3 candidate parameters. Above was already decided that v_skip can be reused on each slide, and the system variables will always be the same.
Shared action Skip_Frames
When you choose to save any of the advanced actions used to skip frames as a Shared Action you'll see that all possible parameters are marked as OK. The reason is that there is no compulsory parameter in this action:

As a result of the analysis above, we need to mark to items as parameters: the tracking variable and the number of seconds to be jumped on later visits. The result will look like this. It is important to give a good description not only for the shared action but also for the marked parameters:

You can assign the shared action to all the slides where you want to jump frames on a later visit. You only have to define a tracking variable and estimate the number of seconds to be jumped. Here is one example setup for the slide where audio had to be jumped on later visits:

You can check in the Library for the Usage of the Shared action, much easier than for advanced actions.
Using Skip_Frames in future projects
Want to reuse this action in other projects? The workflow is described in an older blog post. Short summary:
- Use File, Import, External Library and point to the project where you created the shared action.
- Library will be opened in a floating panel. Look for 'Skip_Frames' in the Shared Actions subfolder and drag it to the Library of the new project.
- Because v_skip is not a parameter in the shared action, it will be created automatically, including the description.
- You have to create a tracking variable for each slide to which you want to assign the shared action, and define the duration in seconds to be skipped. Ready!